Skip to Content

Pierogi Recipe

Natalie’s grandma made this traditional pierogi recipe for holidays or any time the family had a reason to come together. Making and sharing pierogi is an excellent way to spread the love.

Categories:

a plate of homemade pierogis: potato filled dumplings boiled then fried in a skillet with onion and bacon
Photography by Gayle McLeod

Make Pierogi And Float Away On Potato Pillow

Homemade pierogi is the pinnacle of comfort food. For Natalie’s family, her grandma’s pierogi were the star of the holiday table. And before you ask, there’s no such thing as a lazy pierogi, because making these potato-filled pillows is a real labor of love. But ask any of her family members, and they’ll tell you it is their favorite dish their grandma made.

flour, egg, butter, potatoes, bacon, onion, spices, cottage cheese and sour cream in in prep bowls for pierogi
water being poured into a bowl with flour, salt and eggs to make a dough for pierogis
pierogi dough in a glass bowl made with flour, water, salt and oil
pierogi dough in a glass bowl made with flour, water, salt and oil being covered with a damp towel to allow the dough to rest

What Are Pierogies?

Pierogies are potato-filled dumplings. Every culture has a dumpling, which is to say everyone loves dough filled with tasty things (just looking at the wiki page for dumplings is an experience). In Poland, pierogi are the dumpling of choice and are filled with fluffy seasoned potatoes, and frequently fresh mint, just like Natalie’s grandma used to make.

pierogi filling made with mashed potatoes, salt, pepper, olive oil and mint in a glass bowl
rolled pierogi dough on a wood surface being cut into 3 inch circles with a biscuit cutter
a circle of pierogi dough with mashed potato filling on top
pierogi dough folded in half filled with potato filling and being crimped around the edges with a fork

How To Make Pierogi

  1. Make the dough. Cover with a damp kitchen towel or plastic wrap and let rest for 30 minutes to an hour.

  2. Make the filling while the dough rests.

  3. Roll and cut the dough.

  4. Fill the pierogi. Here’s the thing, you’ll need to move as quickly as possible so the dough doesn't dry out.

  5. Put a pot of water on to boil.

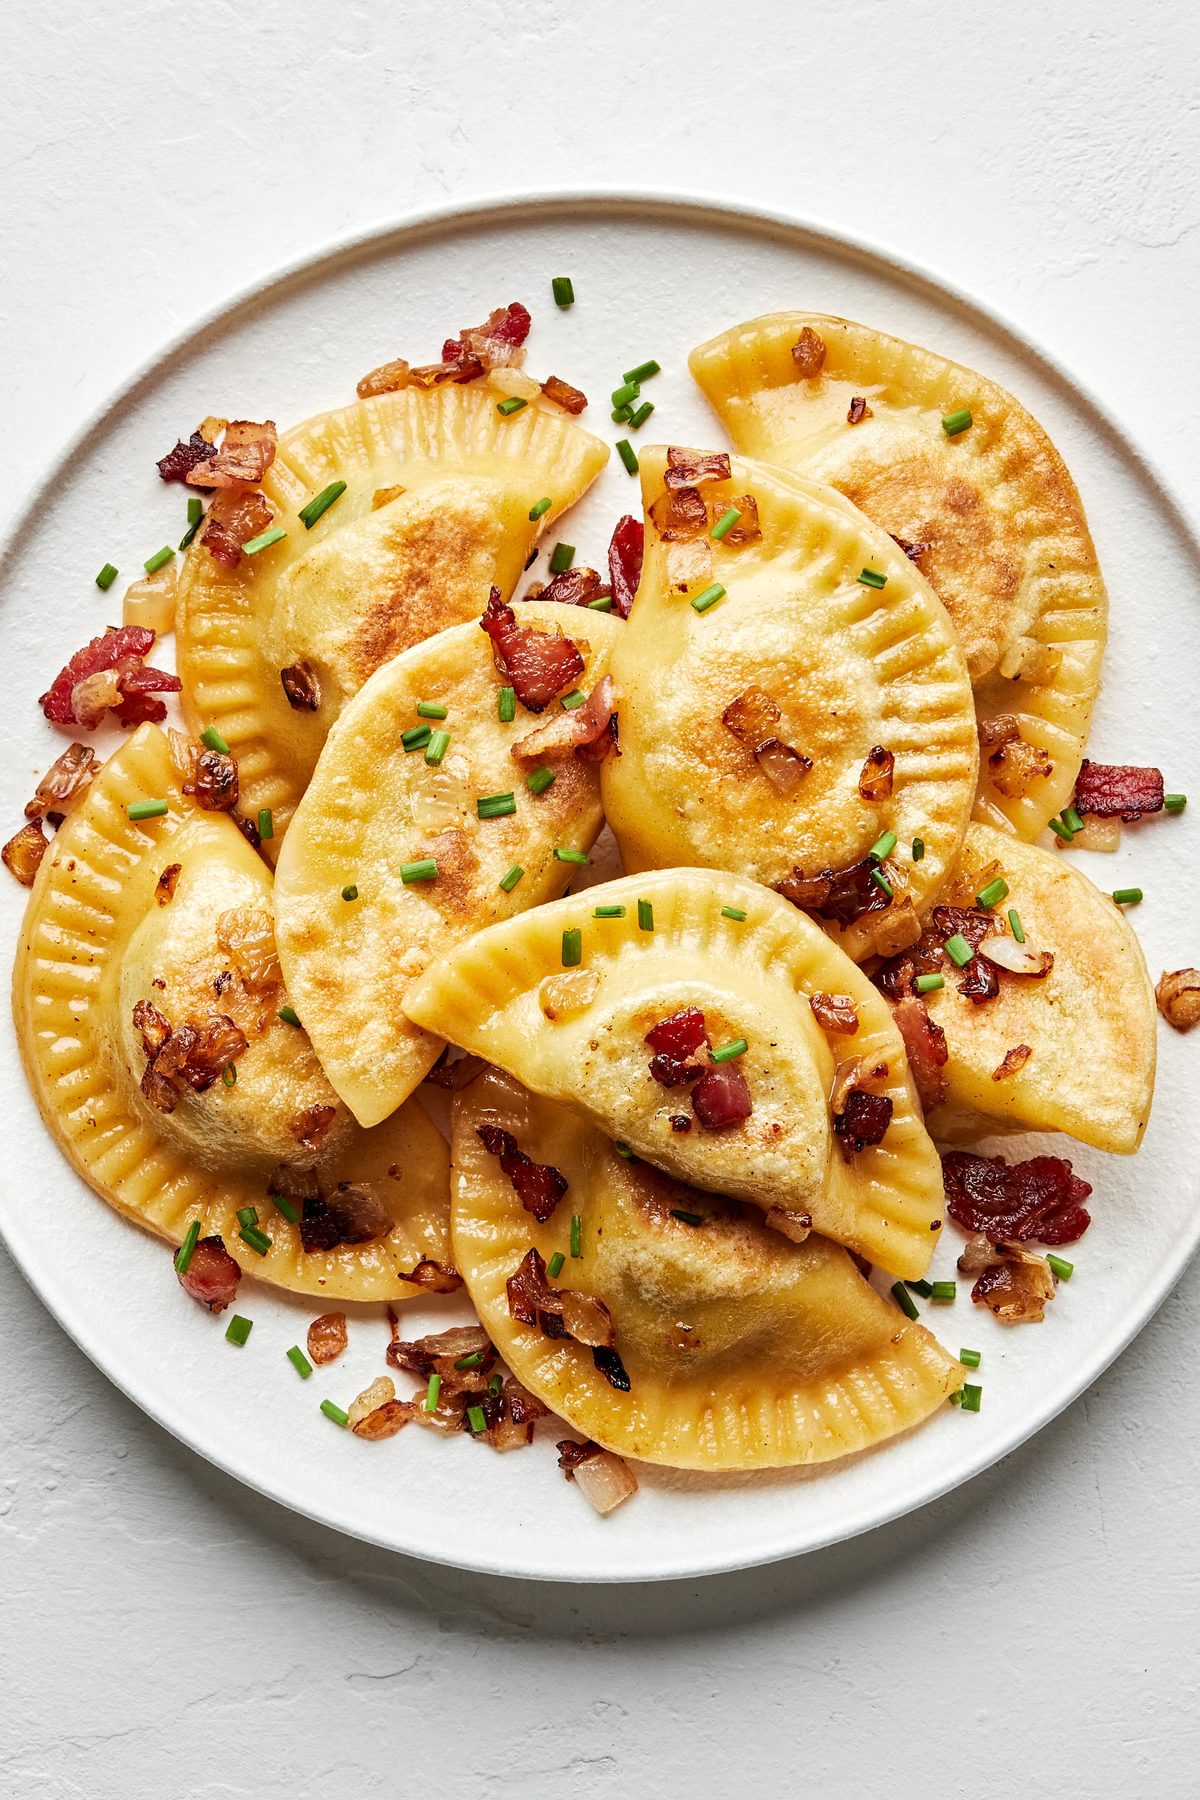
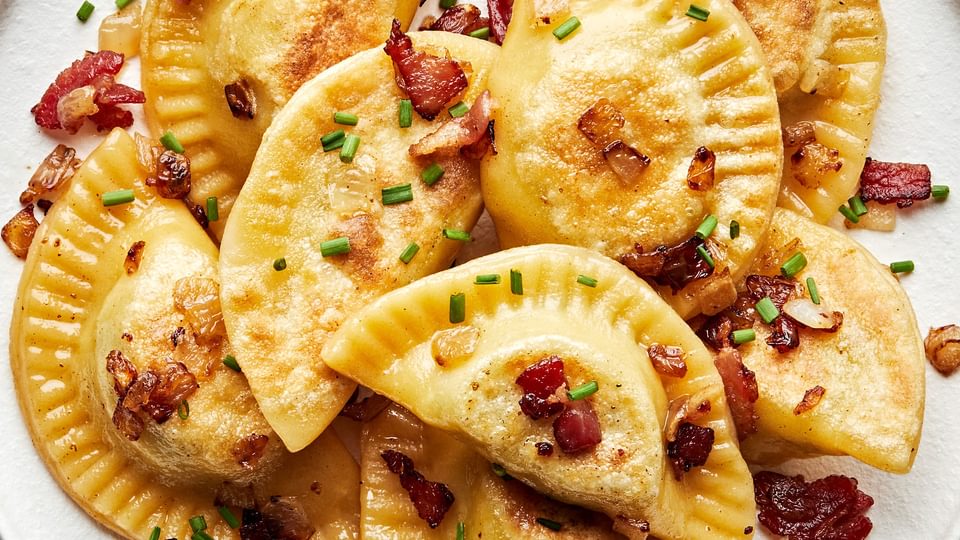
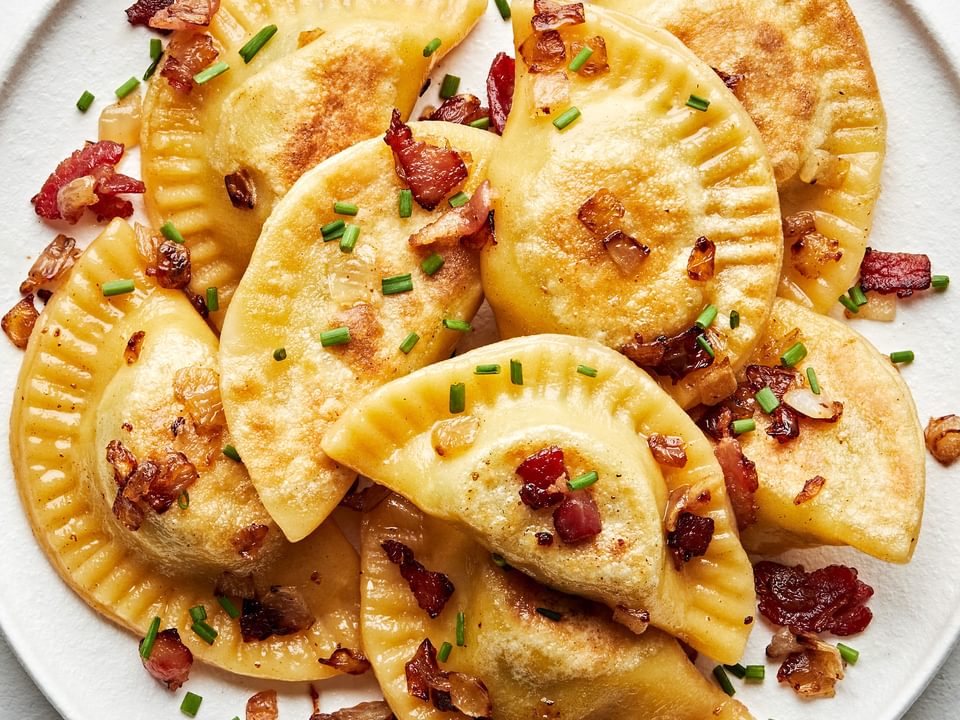
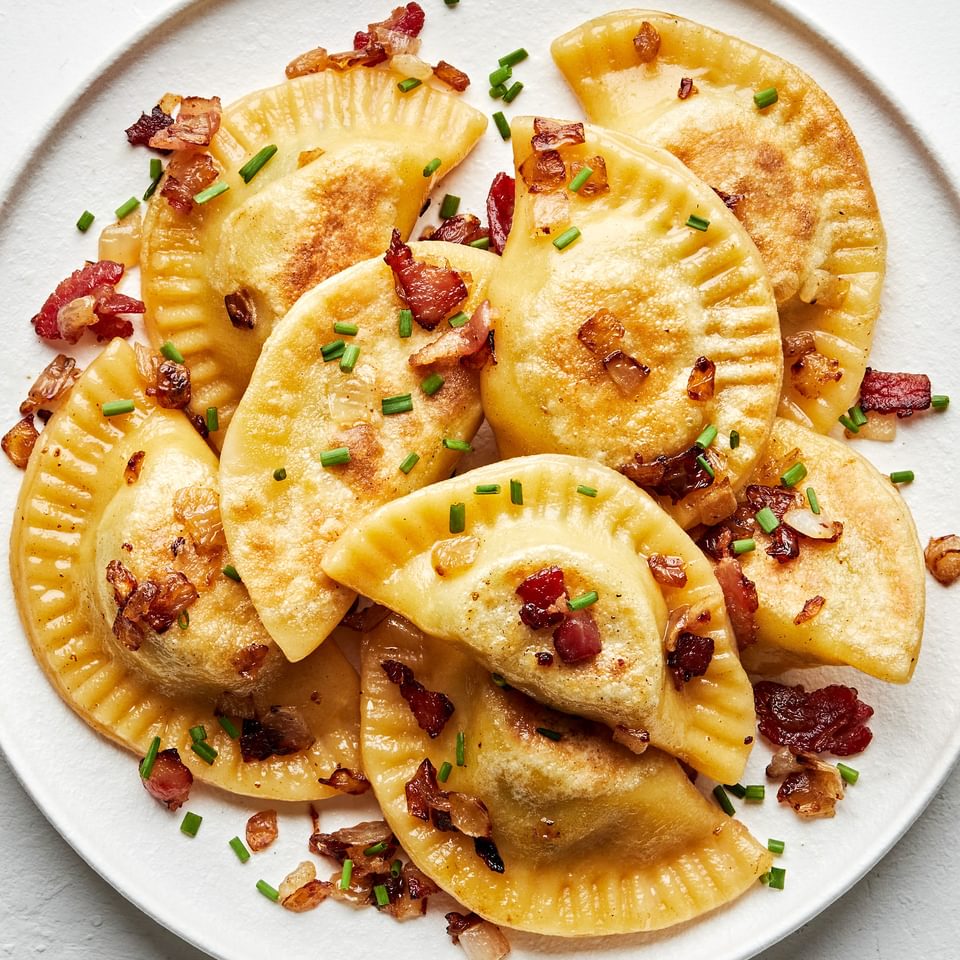
  6. Make the toppings. Cook the onion and bacon in a large skillet.

  7. First, boil the pierogi until they float and then transfer them to the skillet with the onion and bacon. Pan fry the pierogi until they are gently golden.

  8. Serve family style with sour cream or cottage cheese on the side.

prepared pierogis on a baking sheet ready to be cooked by boiling then frying
pierogis being boiled in a large pot of water
boiled pierogi's being fried in a skillet with onions and bacon
homemade pierogi potato dumplings cooked with bacon & onion on a serving plate next to bowls of cottage cheese and sour cream

Some Pierogi Thoughts

If it’s your first time entering the world of pierogi, you might have some questions on your mind. We set out to answer those questions before you embark on your dumpling journey.

  • Are pierogies Polish or Ukrainian? Pierogi (that’s the plural form, but pierogies and also perogy is also used) are Polish, and vareniki (or varenyky) are Ukrainian.

  • What are pierogies made of? Pierogi are dough wrapped around a filling. The most basic of which is a seasoned potato filling, but can also include meat, cheese, and sometimes sweet fillings like fruit!

  • Is it better to fry or boil pierogies? The finest pierogi are boiled and then pan fried, and that’s how we do it.

  • What to serve with pierogies? We recommend setting the table with Roasted Garlic Honey Baked Ham and a bubbling dish of Scalloped Potatoes.

homemade pierogi potato dumplings cooked with bacon & onion on a serving plate next to bowls of cottage cheese and sour cream

Tools You’ll Need

It’s A Labor Of Love, And That’s Why We Love It

We definitely love a quick and easy weeknight meal. But like our homemade pierogi, some good things take time. Here’s a few more recipes that take a little more time, but that are totally worth the investment:

Make Grandma’s Pierogi And Rejoice!

Did you make Natalie’s grandma proud by making her Polish pierogi recipe? Snap a photo of your homemade pierogies and maybe even a video of the beautiful people you feed them to. Tag us on Instagram using @themodernproper and #themodernproper. Happy eating!

Pierogi Recipe

  • Serves: 12
  • Yields: 25
  • Prep Time:  1 hr 30 min
  • Cook Time:  30 min

Ingredients

Dough

  • 2½ cups all-purpose flour, plus more for rolling
  • 1 teaspoon sea salt
  • 2 eggs, beaten
  • 2 tablespoons vegetable oil

Filling

  • 2 pounds russet potatoes, peeled and cut into 1-inch pieces
  • 2 tablespoons kosher salt, plus more to taste
  • ½ teaspoon freshly cracked black pepper
  • ½ cup salted butter or extra-virgin olive oil
  • ⅓ cup finely chopped fresh mint

For Serving

  • 1 medium yellow onion, diced
  • 4 strips bacon, roughly chopped
  • Cottage cheese, for serving (optional)
  • Sour cream, for serving (optional)

Method

  1. Make the dough. In a large bowl combine the flour and salt. Stir in ½ cup of water, eggs, and oil and mix until a shaggy dough forms. Turn the dough out onto a floured surface. Knead the dough with floured hands until smooth, about 10 minutes. Cover with a damp kitchen towel or plastic wrap and let rest for 30 minutes to an hour.

  2. Meanwhile, make the filling. Add the potatoes and salt to a large pot and cover with 3 inches of cold water. Bring to a boil over high heat, then reduce the heat to a simmer and cook until potatoes are fork tender, about 20 minutes. Drain and transfer to a second large bowl. Add the pepper, butter, and mint, and mash until mostly smooth. Adjust salt to taste.

  3. Cut the dough in half, leaving half covered. On the lightly floured surface, roll half of the dough until ¼ inch thick. Using a 3 inch biscuit cutter, cut out 12-15 pieces of dough. Repeat with the remaining dough and any dough scraps.

  4. Lightly flour a rimmed baking sheet. Working with one piece at a time, gently roll each dough round until slightly thinner. Add 1 tablespoon of potato mixture to the center of each dough round. Using your finger, spread water along the edge of each round, then fold the edges together to form a crescent shape. Seal with a fork, being careful not to pinch in any filling, and transfer to the prepared sheet. See Note.

  5. Bring a large pot of water to a boil over high heat and salt it.

  6. Meanwhile, add the onion and bacon to a large skillet and cook over medium heat until the onion is tender and bacon begins to crisp, about 4 minutes.

  7. Once the water is boiling, add 4-5 pierogi to the pot at a time and cook until they are floating, about 2-3 minutes. Using a slotted spoon, remove them from the water, allowing excess water to drip off, and transfer to the skillet with the bacon and onion. Once all of the pierogi have been added to the skillet, cook over medium-high heat until golden brown, about 2-3 minutes per side. Transfer to a large platter.

  8. Serve family style with sour cream or cottage cheese on the side, if using.


Note: When filling the pierogi, move as quickly as possible so the dough doesn't dry out.

Freezing instructions: After forming the pierogi, arrange on the prepared sheet without touching. Freeze for 3 hours or until the dough is hard, then transfer to a zip top freezer bag and store for up to 3 months. When ready to make, cook through the rest of the recipe as instructed.

Nutrition Info

  • Per Serving
  • Amount
  • Calories251
  • Protein5 g
  • Carbohydrates33 g
  • Total Fat11 g
  • Dietary Fiber2 g
  • Cholesterol51 mg
  • sodium1226 mg
  • Total Sugars1 g

Pierogi Recipe

Questions & Reviews

Join the discussion below.

or
  • Cheryl K Konn

    I like the use of a softer cabbage leaf. I always have trouble with the cabbage not being translucent enough. The original version were more greasy and cooked to death....I believe.

    Good tip Aunt Cheryl!

  • Cheryl K Konn

    I am Natalie's great aunt and I can say that yes, it was a family tradition to have these at Christmas and Easter back in the days. I must admit...the originals made by Ma Konn were a far cry from the ones Natalie ate. Ma Konn's recollection from the old country and she was known as NOT a good cook. But her daughter, Natalie's grandmother and my sister-in-law took them to the next level. Her pierogis were then one of the traditional favorites we all remember from family gatherings. Yesterday....I was at Natalie's mother's house for the Easter feast and yes ....pierogis were there.

    So glad you love them too Aunt Cheryl!

  • Kay

    These might be the most comforting thing I've ever eaten. The whole family LOVED them. Thanks so much for sharing this recipe, these will definitely be making our Easter menu!

    Thanks Kay! We are so glad you and your family enjoyed them!